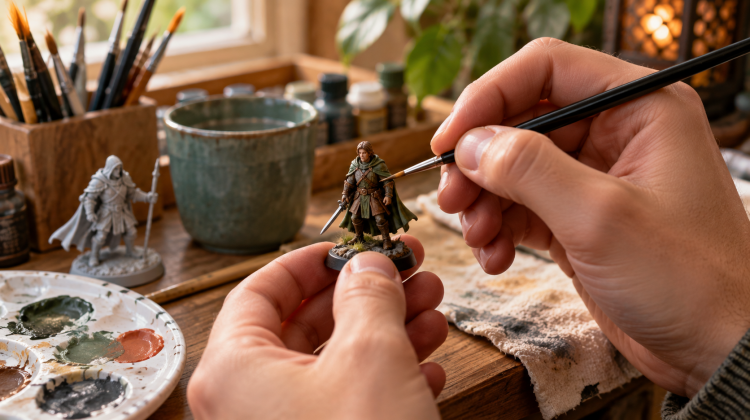
Maybe you want your D&D character to look like your character. Maybe an unpainted Warhammer army is staring at you from its box. Either way, start with one miniature you are excited to finish. You do not need an airbrush, a wall of paints, or the steady hands of a fantasy surgeon. You need a manageable figure, a few colors, and permission to learn as you go.
Choose a miniature that makes starting easy
Picture your first D&D character: a small knight with a cloak, shield, and sword. Choose three main colors for the cloak, armor, and shield, plus a light color for highlights. Your goal for the first evening is to make those shapes readable across the table, not paint a face worthy of a close-up photo. For Warhammer 40,000, the same approach works on one basic troop before you commit to painting a whole squad.
Look for a figure with clearly separated features: a cloak, armor, a weapon, or broad areas of clothing. These give you places to practice without making every brushstroke microscopic. A single adventurer, monster, or troop is less overwhelming than a large display piece. Where can you find one? Check a local game store, tabletop hobby shop, miniature-painting event, or the unpainted-figure shelves of a retailer you already use. If a shop hosts a beginner paint night, you may be able to try the hobby before buying a full kit.
Read the package before you reach for paint. Primed or ready to paint means the surface has been prepared for painting. Unprimed usually needs preparation and primer appropriate to the material. Prepainted has already been colored. Some D&D miniature lines are sold primed and ready to paint, but do not assume every miniature is. Check that particular product.
Beginner shortcut: If designing a custom figure or running a 3D printer sounds like a second hobby, buy a ready-made, primed miniature and make it yours with paint. A premade D&D figure, a Warhammer troop, or a custom character ordered from a design service can still wear your own colors. You can learn printing later, after you know you enjoy painting.
The small kit that is enough for one figure
- One miniature, with primer if its instructions call for it.
- A handful of hobby acrylic colors: choose the largest areas first, plus a light and a dark color.
- A medium brush that holds a point and a smaller brush for edges and details.
- A palette or smooth reusable surface, water for rinsing, a cloth, and good light.
- Optional later: a wash for easy shadows, a simple holder, and protective varnish.
You can skip an airbrush, a huge paint set, and a magnifier while discovering whether you enjoy the process. If you use a spray primer or varnish, follow its ventilation and application directions. A brush-on product may be more convenient for a single small figure.
Paint the broad areas first
Place a little acrylic paint on your palette. Add water a drop at a time until it flows smoothly from the brush without pooling in every crease. Start with the largest areas, let each thin layer dry, and apply another if you can still see the primer through it. Thin controlled coats generally preserve sculpted details better than one thick coat.
Once the cloak, armor, skin, or fur is readable, add the smaller details. Rest your hands against each other or the desk for stability, and turn the miniature so the brush approaches an edge comfortably. If a detail takes three tries, that is ordinary miniature painting, not proof that you are bad at it.
How to fix a slip
Say the cloak color lands on the knight’s silver shoulder. If it is still wet, rinse your brush, blot it until it is only slightly damp, and lift the stray paint with the tip. If it has dried, stop rubbing and paint the silver back over it in a thin layer. If you blur the edge again, let it dry and restore the cloak color. Two calm corrections usually beat one frantic attempt to scrape everything away.
If paint strays onto a neighboring area while still wet, try lifting a little with a clean, slightly damp brush. Avoid scrubbing. If it has dried, let it stay dry and cover the spot with the earlier color. Keeping each base color on your palette makes this easier. For a tiny edge, a fine brush tip can restore the boundary; a toothpick can sometimes help with a small wet spot, but test gently so you do not scrape the primer or sculpt.
A larger mistake can become a new base coat. You can paint over an area after it dries, provided you keep the replacement layers thin. Save your first miniature even if it is messy. It is a far better record of progress than a blank one.
Protect it if you will handle it often
Once the paint has dried as directed, a miniature-compatible clear varnish can help protect a figure that will travel in a game box or be handled at the table. Matte gives a less shiny finish, while satin or gloss changes the look. Follow the varnish directions for compatibility, drying, and ventilation. You can decide on this step after you know how the figure will be used.
Your first miniature is finished when you decide it is. Put it on the table, notice what you enjoyed painting, and use that to choose the next character, creature, or squad.
Want a Custom Mini? Choose Who Does the Printing
If the shape matters as much as the paint scheme, try designing a character in Hero Forge. You can adjust the pose, clothes, gear, and appearance without owning a printer. Then choose between an unpainted physical miniature they print for you and an STL file for printing yourself. A Standard Plastic miniature arrives primed, so you can paint it in your own colors. A virtual-tabletop 3D model is a different product from a printable STL; check the format before buying.
For a cost check as of September 2026, Hero Forge lists Standard Plastic minis starting at $19.99 and a single printable STL at $7.99. Larger or more complex designs, shipping, and optional finishes can change the final price. Those numbers make ordering one custom figure a reasonable way to experiment before buying printing equipment.
If You Print Your Own, Expect a Second Learning Curve
Start with a sample STL and printing guide, then learn your printer’s slicing software, supports, orientation, and how to handle a failed print. Fine miniature details often lead hobbyists toward resin printing, but the printer is only part of the setup: you also need suitable resin, washing and curing supplies, protective equipment, ventilation, and a place to handle and dispose of materials according to their instructions. Follow the NIOSH guidance on 3D printing safety and the specific material’s directions.
Budget several hundred dollars upfront for a home resin setup rather than assuming the STL price is the whole cost. For context, one manufacturer’s current listings show entry resin printers in the hundreds of dollars, with separate wash-and-cure machines and consumables. Prices move, so compare a complete cart before committing. A local makerspace or print service can let you test a file and inspect the result before deciding whether owning a printer is worth the space, cleanup, and practice.
The first project can still be a ready-made miniature. Custom design and printing are satisfying branches of the hobby when you want a particular character or plan to make enough figures to enjoy the extra process.
Further reading
WizKids lists examples of primed, ready-to-paint D&D miniatures. The Army Painter’s guides explain priming and basic painting, thin layers, and protective varnish. These are technique references, not product endorsements.
Leave a Reply